
Silent Hill f Main Hall Walkthrough and Guide
Complete walkthrough for navigating the Dark Shrine's Main Hall, defeating enemies, and finding all collectibles
Introduction to Silent Hill f Main Hall
The Main Hall in Silent Hill f serves as the central hub of the Dark Shrine, featuring multiple floors, challenging enemies, and essential abilities to unlock. This comprehensive guide will help you navigate through all three ritual chambers and uncover all secrets.
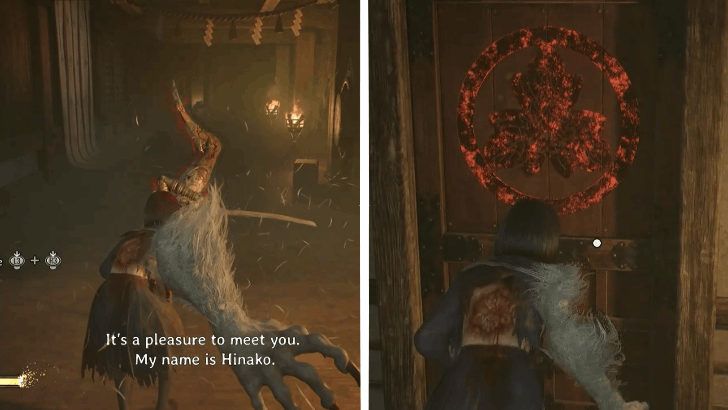
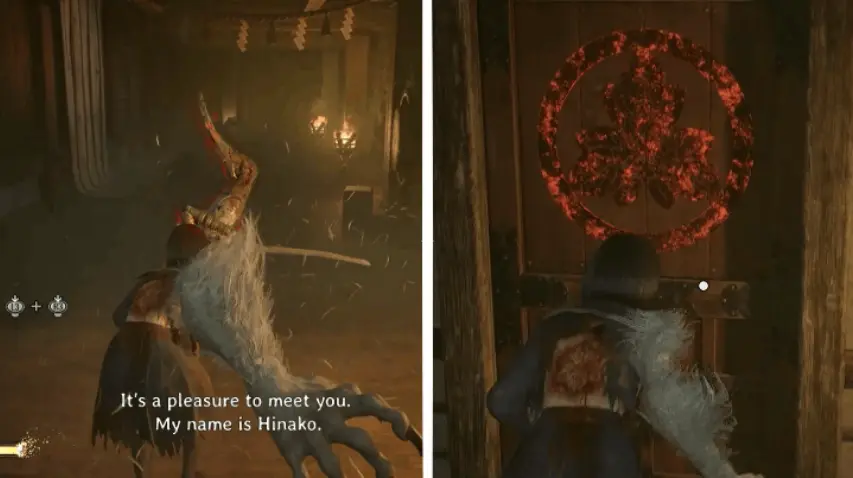
"Hinako wakes up back into the Dark Shrine, and is asked by the Fox Mask to do three trials. The first of which requires Hinako to go through the first floor of the Shrine."
First Ritual: Fox Arm Acquisition Guide
Begin your journey through the Main Hall by completing the first ritual and obtaining the essential Fox Arm ability.
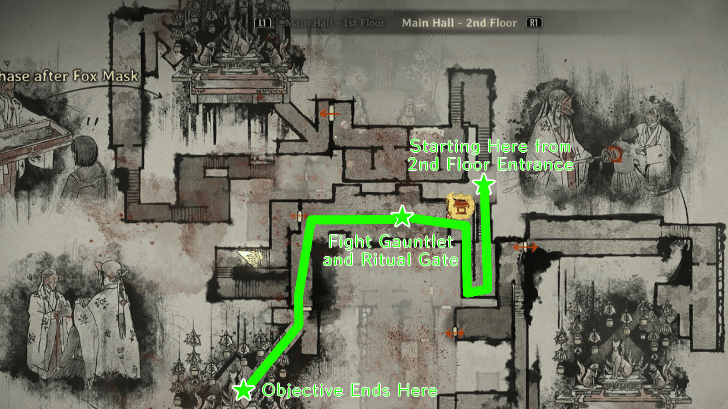
Route to First Ritual Chamber
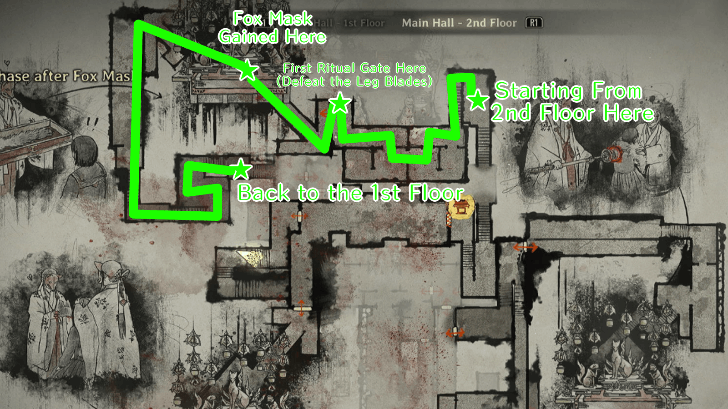
From the 1st floor, use the left main staircases to reach the right side of the 2nd floor. Clear the area by heading left and unlocking the ritual gate.
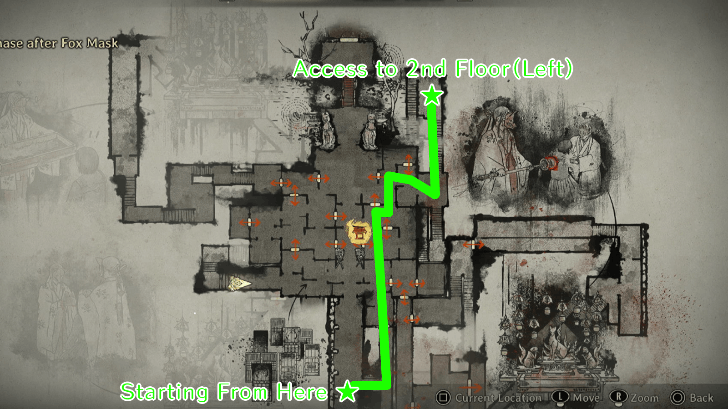
Combat Strategy
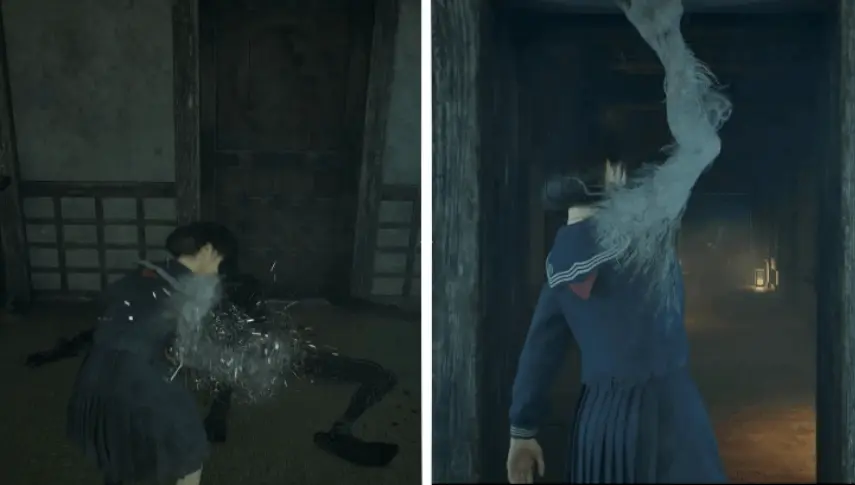
You'll encounter Blade Leg Monsters on the second floor that must be defeated to proceed. After eliminating them, you can access the locked door further left.
Fox Arm Abilities and Uses
The Fox Arm is your new implement against foes and obstacles in the Dark Shrine. Being stronger and more functional than other melee weapons, its primary use is to permanently take down reanimating enemies.
- Use Focus Attack when enemies are downed for permanent kills
- Open previously inaccessible heavy metal doors on the first floor
- Essential for progression through the Dark Shrine
Second Ritual: Bestial Form Walkthrough
Return to the first floor to begin the second ritual, where you'll unlock the powerful Bestial Form ability.
Path to Second Ritual Area
Using your Fox Arm to open metal doors, unlock a passageway to the right of the main staircase that leads down to the second ritual area.
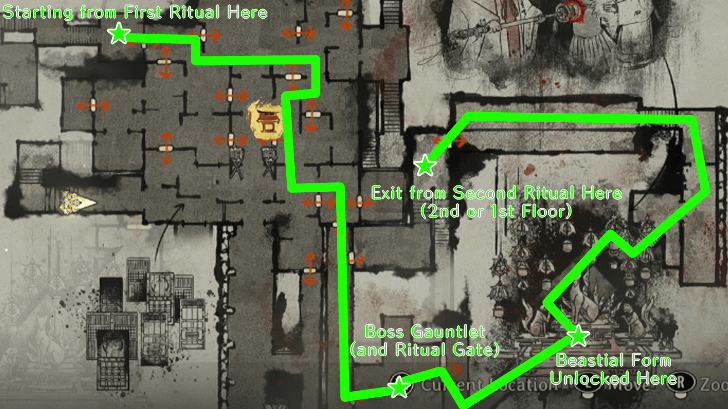
Gauntlet Room Challenge
To the left of the Hokora Shrine is a challenging room where you must defeat two Birthing Monsters to proceed. After this fight, open the door to the right to trigger a cutscene and gain the Bestial Form.

Bestial Form Combat Guide
Bestial Form allows Hinako to enter an Awakened burst mode when enough Soul Siphons have filled her charge meter. Use your Special Action key to trigger and revert the burst state.
- Permanently kill enemies while the burst is active
- Gain follow-up combos and deal significantly more damage
- Access Kudzu-Sealed doors for secrets and collectibles
- Use your map to locate these specific doors
Final Ritual: Mask of the Fox Clan Guide
Complete the third and final ritual to obtain the Mask of the Fox Clan, unlocking new areas and abilities.
Route to Final Ritual Chamber
Head to the main staircase where you initially went for the first ritual, but this time take the right stairs and open the kudzu-sealed door. Beyond the Hokora Shrine is a room to the right featuring another enemy gauntlet.
Final Gauntlet Challenge
This room features a Drum Monster and some Blade Legs that must be eliminated to proceed. Once defeated, head to the end of the room with the grand door to trigger a cutscene and receive the Mask of the Fox Clan.

Mask of the Fox Clan Abilities
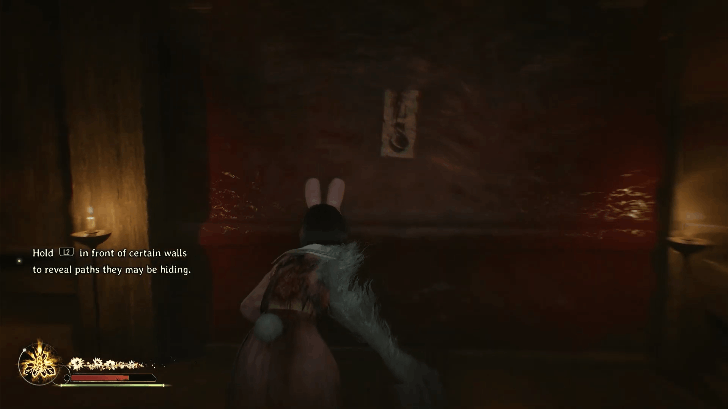
The Mask of the Fox Clan allows Hinako to use her Focus ability to unlock secret paths blocked by bloodied seals in the Dark Shrine.
- Reveal hidden paths and secrets throughout the Main Hall
- Access previously inaccessible areas
- Essential for finding all collectibles and completing exploration
Chasing Fox Mask: Boss Preparation
After completing your exploration or receiving the mask, follow the blue light of the Fox Mask and descend to the 1st floor for the upcoming boss encounter.
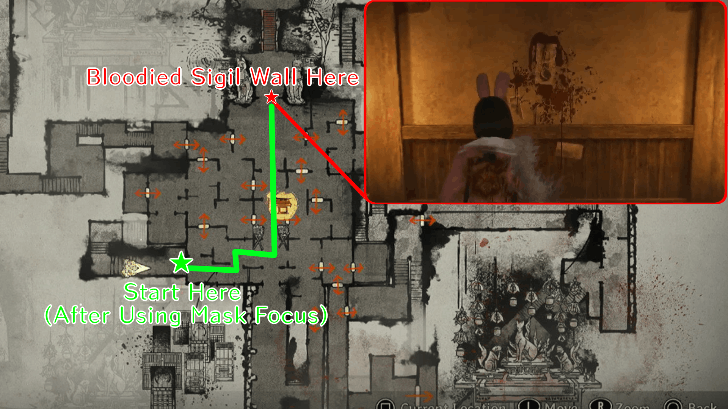
Path to Boss Arena
Use your new ability to melt through one of the bloodied sigil walls that block the way. Upon reaching downstairs, save at the nearest Hokora Shrine then proceed through the suspiciously blocked sigil wall between the two fox statues in the center room.
New Game+ Exclusive: Agura no Hotei-Sama
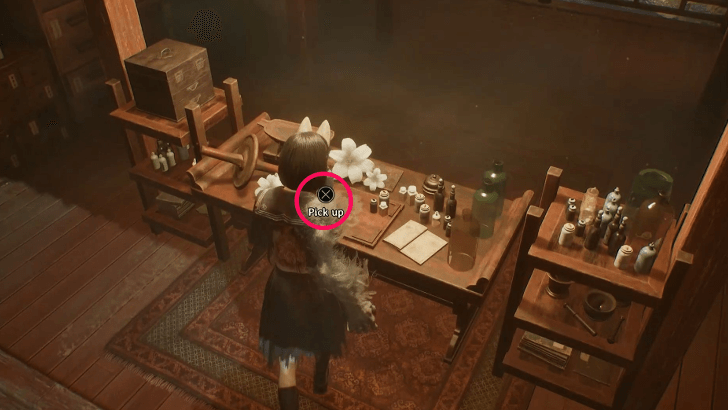
On a New Game+ run, you can access a secret area on the 2nd floor by melting the bloody wall sigil on the right-side wall, unveiling a path to a huge shrine.
Inside, find the Agura no Hotei-Sama on a table - a crucial item necessary for obtaining the Fox's Wedding ending.
Rinko-Like Entity Boss Fight Strategy
The Rinko-like Entity serves as the official second boss fight of Silent Hill f, featuring multiple phases and challenging attacks.
Boss Mechanics and Attack Patterns
Similar to the Sakuko-like Entity fought earlier, Rinko has aggressive Area-of-Effect attacks in both phases and becomes more aggressive after taking significant damage.
Combat Tips:
- Use your newly-formed abilities like Awakened Form to tank hits
- Deal massive damage while in Awakened state
- Be extremely careful when Awakened Form isn't charged
- Rinko can throw many rapid attacks up close
Post-Boss Sequence
After defeating Rinko, Hinako faints and wakes up back at Shu's House, still alone. She then meets with a strange entity and is forced to return to her residence, progressing the story.
Main Hall Enemies and Bestiary
The Main Hall features various challenging enemies that you'll encounter throughout your journey. Upgrade your character's stats and equip Omamoris to make these encounters easier.

Birthing Monster
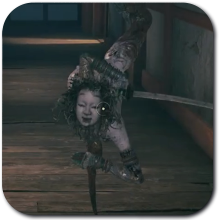
Blade Legs Monster

Drum Monster

Oi-omoi

Shackled Monster
Main Hall Collectibles and Missables Guide
Ensure you don't miss any important items during your exploration of the Main Hall with this comprehensive collectibles guide.
Agura no Hotei-sama Location
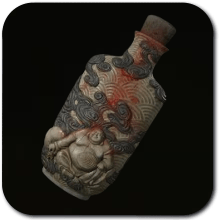
The Agura no Hotei-sama can be found in the New Game+ exclusive area, Hermitage of the Crimson Water, and is essential for obtaining the Fox's Wedding ending.
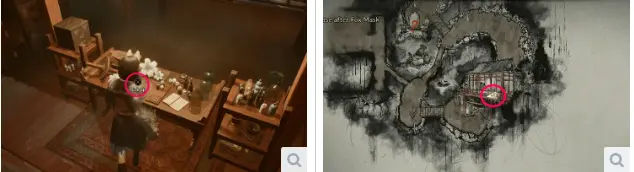
Hidden Omamori Locations

The Crow Omamori can be obtained in a room south of the northwestern stairs in the Dark Shrine Main Hall. You will need the Fox Arm to open the door to access this item.
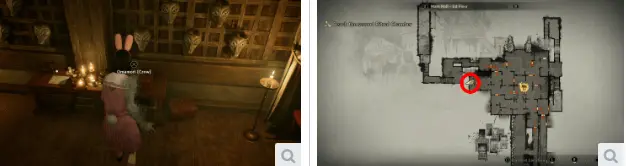
Inventory Upgrade Locations
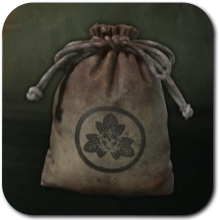
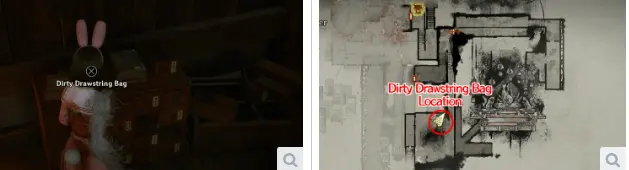
The Dirty Drawstring Bag can be found in a nearby area just right after the second ritual cutscene where you obtain the Bestial Form. This item expands your inventory capacity.
Silent Hill f Main Hall Completion Tips
With this comprehensive guide, you should now be able to successfully navigate the Dark Shrine's Main Hall, defeat all enemies and bosses, and collect all important items.
Key Takeaways:
- Complete all three rituals to unlock essential abilities
- Use Fox Arm for permanent enemy kills and opening heavy doors
- Utilize Bestial Form for increased damage and accessing Kudzu-Sealed doors
- Employ Mask of the Fox Clan to reveal bloodied seal paths
- Explore thoroughly to find all collectibles and upgrades
- Prepare adequately for the challenging Rinko-like Entity boss fight