
Silent Hill f Mural Puzzle Guide
Complete Walkthrough for the Game's Most Challenging Puzzle
Understanding the Silent Hill f Mural Puzzle
The final puzzle in Silent Hill f stands as its most formidable challenge. The Mural requires careful experimentation, meticulous attention to detail, and an abundance of patience. This comprehensive guide will help you understand how this complex puzzle functions and how to solve it across different difficulty levels.
⚠️ MAJOR SPOILER WARNING
The Mural puzzle occurs so late in the game that, due to certain Shrine World mechanics, almost any screenshots we show you are automatically major spoilers. Do not continue reading unless you're already at this point in the game.
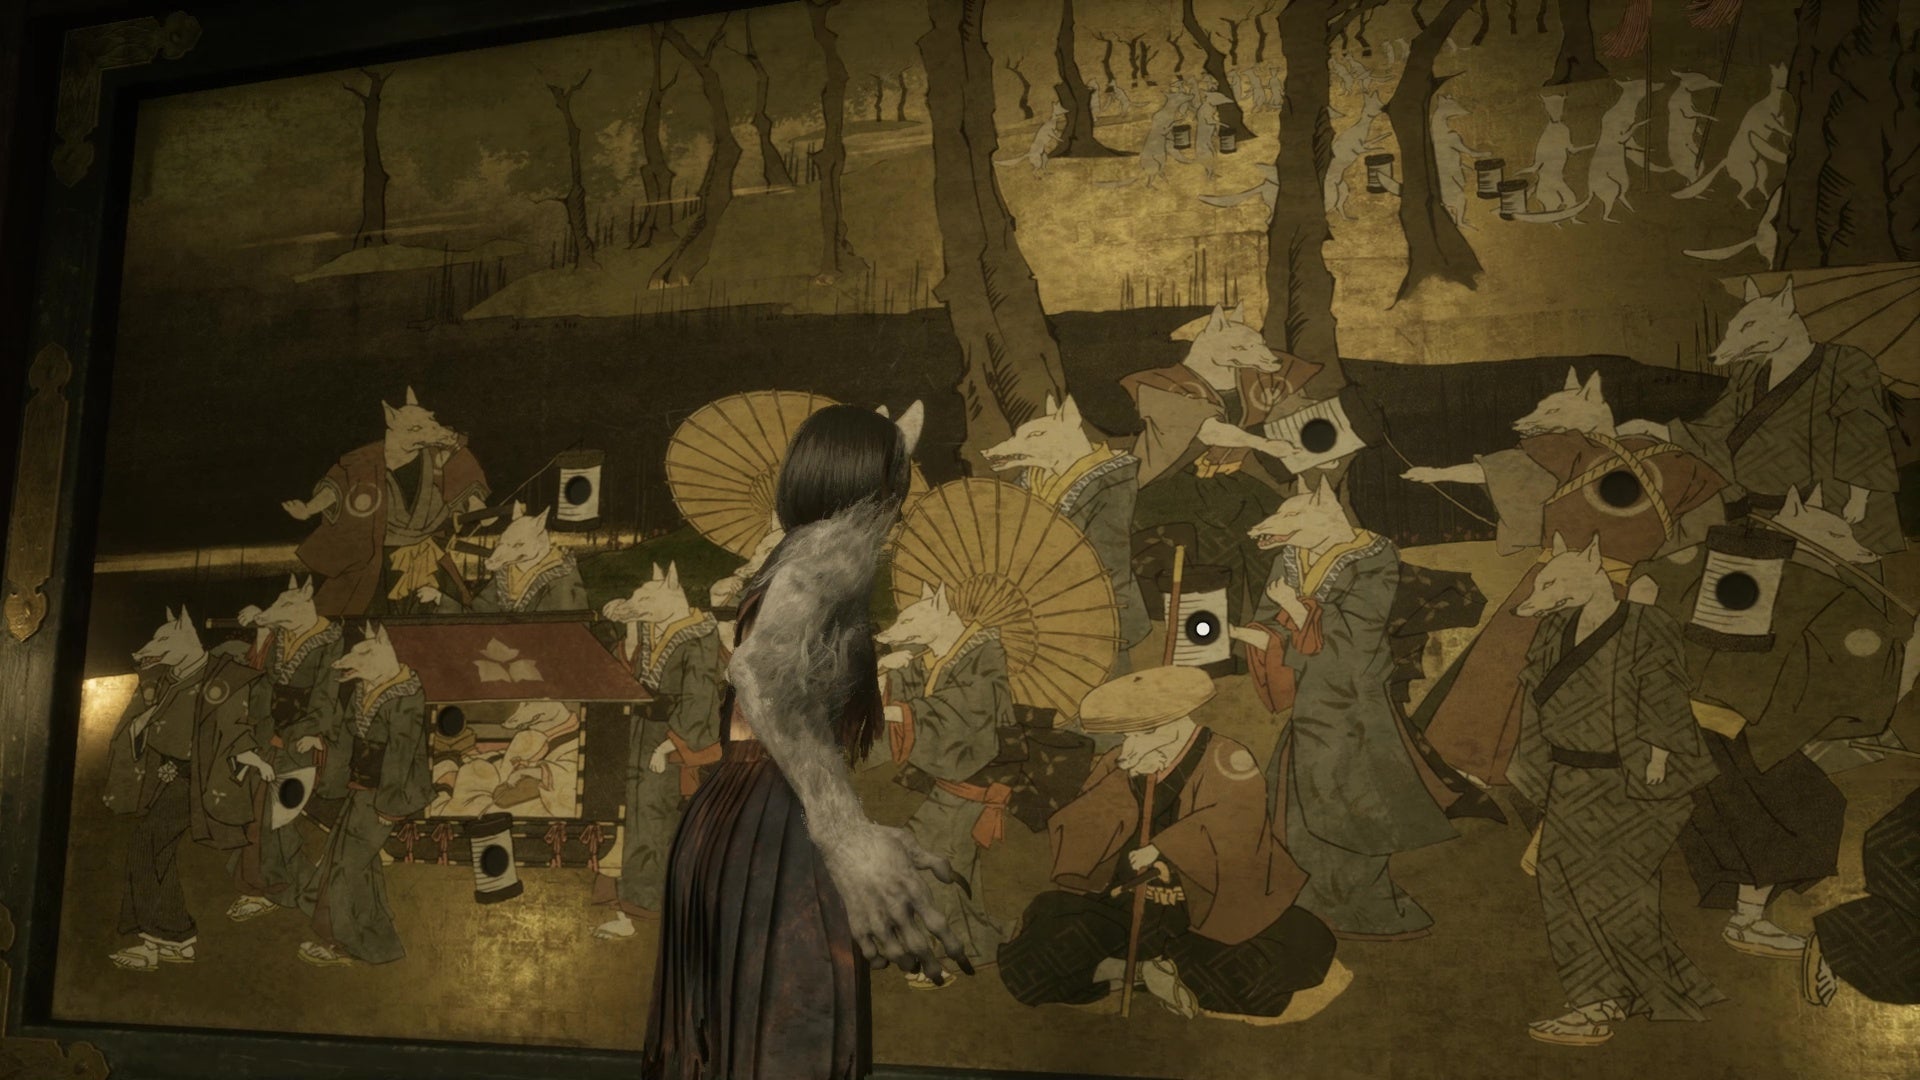
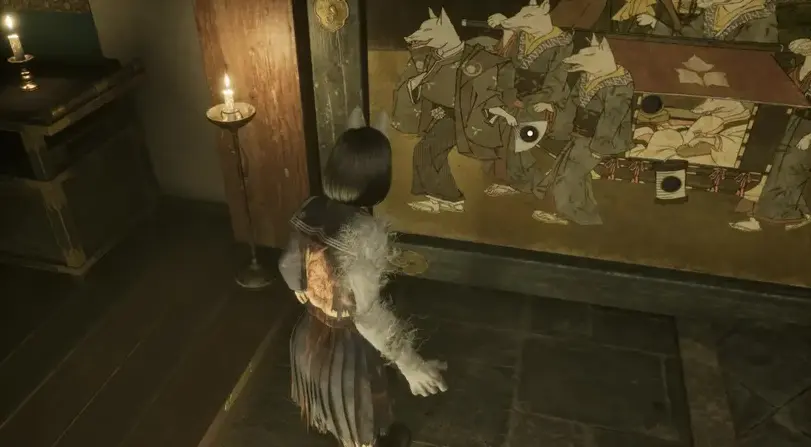
The mysterious fox-themed mural with its nine slots
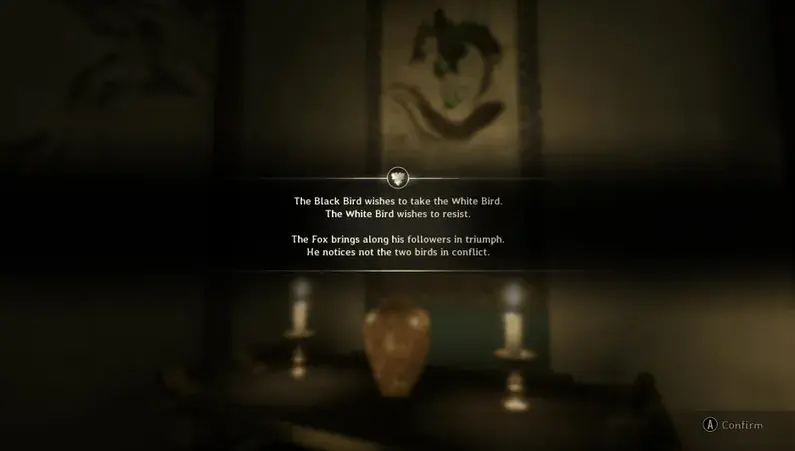
The clue wall containing the poetic hints
Silent Hill f Mural Puzzle Mechanics Explained
The Mural puzzle represents the pinnacle of Silent Hill f's challenge. Your objective is to place the three crests you've recently discovered - the Fox Mask Crest, Black Sparrow Crest, and White Sparrow Crest - into the nine available slots within this intricate, fox-themed mural.
Key Challenge Factors
- No individual feedback for placement choices
- Only complete success or failure states
- Solutions vary based on your current ending path
- Multiple possible solutions across different playthroughs
Your primary clue for solving the Mural puzzle is found on the wall to its left, where a short poem provides metaphorical hints toward the correct solution. While the mural's basic mechanics remain consistent across difficulties, the hints become increasingly abstract and plot-relevant as the challenge escalates.
Important Discovery
Recent findings indicate that the Mural puzzle solution can vary dramatically between playthroughs, even when players are using identical difficulty settings. The Mural is one of the late-game puzzles that adapts based on which ending you're progressing toward, suggesting it may have up to 12 possible solutions. This guide is being continuously updated as we document them all.
Story Mode Mural Puzzle Solutions
Ending #1 Solution
"The Black Bird wishes to take the White Bird. The White Bird wishes to resist. The Fox brings along his followers in triumph. He notices not the two birds in conflict."
Crest Placement Guide
- Fox Crest: Leader's fan slot (the only one being followed)
- Black Sparrow Crest: Empty-handed fox's back slot
- White Sparrow Crest: Lantern of fox to the left
⚠️ Previous versions of this guide had the sparrow crest positions reversed
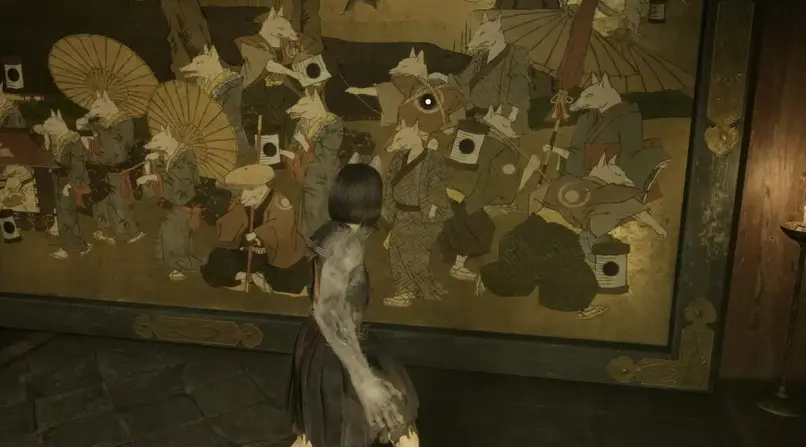
Ending #3 Solution
"The White Bird flies free from her cage. Her shadow follows close behind her. The Fox raises a lantern as he watches them fly away. There is nothing he can do now."
Crest Placement Guide
- White Sparrow Crest: Lower right fox's lantern
- Black Sparrow Crest: Lantern of fox to his left
- Fox Mask Crest: Lantern of fox on carriage top
These represent the two foxes actively running away and the one watching them.
Solution image coming soon
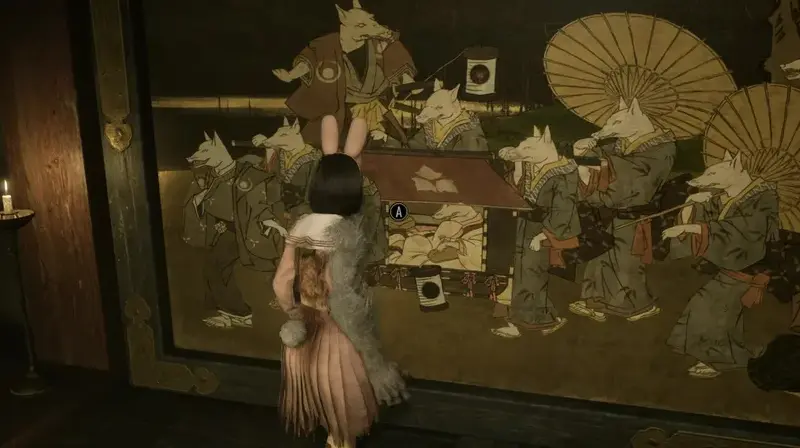
Ending #4 Solution
"Two chicks confide in one another in their shells. A Fox watches over them in the light of his lantern. Nobody knows when, or even if, the eggs will hatch. Not even the chicks themselves."
Crest Placement Guide
- Black Sparrow Crest: Slot on carriage side
- White Sparrow Crest: Lantern just below carriage slot
- Fox Mask Crest: Lantern of fox sitting on carriage top
Hard Mode Mural Puzzle Solutions
Hard Mode Ending #2 Solution
"The Black Bird is in the cage at last. The satisfied Fox spreads his fan. The White Bird remains in a daze. All had been swept away as she slept."
Crest Placement Guide
- Fox Head Crest: Leader's slot (only one with a fan)
- Black Sparrow Crest: Lantern below carriage (finally caged)
- White Sparrow Crest: Confused-looking monk seated on ground
Lost in Fog Mode Mural Puzzle Solutions
Lost in Fog Endings #2 & #3 Solution
"The White Bird flies free from her cage. Her shadow follows close behind her. The Fox raises a lantern as he watches them fly away. There is nothing he can do now."
Crest Placement Guide
- White Sparrow Crest: Lower right fox's lantern
- Black Sparrow Crest: Lantern of fox to his left
- Fox Mask Crest: Lantern of fox on carriage top
Solution image coming soon
Silent Hill f Mural Puzzle Strategy Tips
Interpretation Strategy
- • The Mural represents a veiled story about Hinako's character development
- • Pay close attention to the foxes' positions and actions in the mural
- • Match the poetic metaphors to visual elements in the mural
Practical Approach
- • Take screenshots of your current mural state for reference
- • Document your attempts to avoid repeating failed combinations
- • Consider your current story progression and character relationships
Community Note
The Silent Hill f Mural puzzle continues to be studied by the community. If you discover a new solution or pattern, consider sharing it with other players to help complete our collective understanding of this complex puzzle system.
Silent Hill f Mural Puzzle Video Guide
Video walkthrough coming soon
Video guide showing all Mural puzzle solutions across different difficulty modes and endings